ضبط صدا (Audio Capture) در اندروید
آموزش ضبط صدا در اندروید
اندروید دارای یک میکروفن داخلی می باشد که از طریق آن می توانید صدا را گرفته و ذخیره کنید و یا در موبایل خود اجرا کنید. راههای زیادی برای انجام این کار وجود دارد ما متداول ترین آن از طریق گروه MediaRecorder می باشد.
اندروید گروه MediaRecorder را برای ضبط صدا یا فیلم ارائه می دهد. برای استفاده از گروه MediaRecorder شما در ابتدا باید یک نمونه از آن گروه ایجاد خواهید کرد. به صورت زیر است.
MediaRecorder myAudioRecorder = new MediaRecorder();
اکنون شما منبع، خروجی، فرمت کدگذاری و فایل خروجی را تنظیم کنید. به صورت زیر:
myAudioRecorder.setAudioSource(MediaRecorder.AudioSource.MIC);
myAudioRecorder.setOutputFormat(MediaRecorder.OutputFormat.THREE_GPP);
myAudioRecorder.setAudioEncoder(MediaRecorder.OutputFormat.AMR_NB);
myAudioRecorder.setOutputFile(outputFile);
پس از تعیین منبع صدا، فرمت و فایل خروجی آن می توانیم دو روش اصلی را فراخوانده، آماده کرده و آغاز به ضبط صدا کنیم.
myAudioRecorder.prepare();
myAudioRecorder.start();
علاوه بر این روش ها، روشهای دیگری برای ضبط صدا در گروه MediaRecorder وجود دارند که به شما اجازه می دهند کنترل بیشتری بر روی ضبط صدا و فیلم داشته باشید.
-
setAudioSource()
این روش منبع صدا را که باید ضبط شود، مشخص می کند. - setVideoSource()
این روش منبع فیلم را که باید ضبط شود، مشخص می کند. - setOutputFormat()
این روش فرمت ذخیره صدا را مشخص می کند. - setAudioEncoder()
این روش رمزگذار صدا را که باید مورد استفاده قرار بگیرد، مشخص می کند. - setOutputFile()
این روش مسیر ذخیره ی صدای ضبط شده را تنظیم می کند. - stop()
این روش فرایند ضبط را متوقف می کند. -
release()
این روش هنگامی که نمونه ی ضبط کننده لازم باشد، باید فراخوانده شود.
این مثال توضیحاتی از کلاس MediaRecorder در مورد گرفتن صدا و سپس کلاس MediaPlayer در مورد اجرای صدای ضبط شده ارائه می دهد. برای آزمایش با این مثال لازم است آن را روی یک دستگاه واقعی اجرا کنید.
در اینجا محتوای src/com.example.audiocapture/MainActivity.java را مشاهده می کنید
package com.example.sairamkrishna.myapplication;

import android.app.Activity;
import android.media.MediaPlayer;
import android.media.MediaRecorder;

import android.os.Bundle;
import android.os.Environment;

import android.view.Menu;
import android.view.MenuItem;
import android.view.View;
import android.view.animation.Animation;
import android.view.animation.AnimationUtils;
import android.widget.Button;

import android.widget.ImageView;
import android.widget.Toast;
import java.io.IOException;


public class MainActivity extends Activity {
   Button play,stop,record;
   private MediaRecorder myAudioRecorder;
   private String outputFile = null;

   @Override
   protected void onCreate(Bundle savedInstanceState) {
      super.onCreate(savedInstanceState);
      setContentView(R.layout.activity_main);

      play=(Button)findViewById(R.id.button3);
      stop=(Button)findViewById(R.id.button2);
      record=(Button)findViewById(R.id.button);

      stop.setEnabled(false);
      play.setEnabled(false);
      outputFile = Environment.getExternalStorageDirectory().getAbsolutePath() + "/recording.3gp";;

      myAudioRecorder=new MediaRecorder();
      myAudioRecorder.setAudioSource(MediaRecorder.AudioSource.MIC);
      myAudioRecorder.setOutputFormat(MediaRecorder.OutputFormat.THREE_GPP);
      myAudioRecorder.setAudioEncoder(MediaRecorder.OutputFormat.AMR_NB);
      myAudioRecorder.setOutputFile(outputFile);

      record.setOnClickListener(new View.OnClickListener() {
         @Override
         public void onClick(View v) {
            try {
               myAudioRecorder.prepare();
               myAudioRecorder.start();
            }

            catch (IllegalStateException e) {
               // TODO Auto-generated catch block
               e.printStackTrace();
            }

            catch (IOException e) {
               // TODO Auto-generated catch block
               e.printStackTrace();
            }

            record.setEnabled(false);
            stop.setEnabled(true);

            Toast.makeText(getApplicationContext(), "Recording started", Toast.LENGTH_LONG).show();
         }
      });

      stop.setOnClickListener(new View.OnClickListener() {
         @Override
         public void onClick(View v) {
            myAudioRecorder.stop();
            myAudioRecorder.release();
            myAudioRecorder  = null;

            stop.setEnabled(false);
            play.setEnabled(true);

            Toast.makeText(getApplicationContext(), "Audio recorded successfully",Toast.LENGTH_LONG).show();
         }
      });

      play.setOnClickListener(new View.OnClickListener() {
         @Override
         public void onClick(View v) throws IllegalArgumentException,SecurityException,IllegalStateException {
            MediaPlayer m = new MediaPlayer();

            try {
               m.setDataSource(outputFile);
            }

            catch (IOException e) {
               e.printStackTrace();
            }

            try {
               m.prepare();
            }

            catch (IOException e) {
               e.printStackTrace();
            }

            m.start();
            Toast.makeText(getApplicationContext(), "Playing audio", Toast.LENGTH_LONG).show();
         }
      });
   }

   @Override
   public boolean onCreateOptionsMenu(Menu menu) {
      // Inflate the menu; this adds items to the action bar if it is present.
      getMenuInflater().inflate(R.menu.menu_main, menu);
      return true;
   }

   @Override
   public boolean onOptionsItemSelected(MenuItem item) {
      // Handle action bar item clicks here. The action bar will
      // automatically handle clicks on the Home/Up button, so long
      // as you specify a parent activity in AndroidManifest.xml.

      int id = item.getItemId();

      //noinspection SimplifiableIfStatement
      if (id == R.id.action_settings) {
         return true;
      }
      return super.onOptionsItemSelected(item);
   }
}
در اینجا محتوای activity_main.xml را مشاهده می کنید
<RelativeLayout xmlns:android="http://schemas.android.com/apk/res/android"
   xmlns:tools="http://schemas.android.com/tools"
   android:layout_width="match_parent"
   android:layout_height="match_parent"
   android:paddingLeft="@dimen/activity_horizontal_margin"
   android:paddingRight="@dimen/activity_horizontal_margin"
   android:paddingTop="@dimen/activity_vertical_margin"
   android:paddingBottom="@dimen/activity_vertical_margin"
   tools:context=".MainActivity">

   <TextView
      android:layout_width="wrap_content"
      android:layout_height="wrap_content"
      android:text="Android Audio Recording"
      android:id="@+id/textView"
      android:textSize="30dp"
      android:layout_alignParentTop="true"
      android:layout_alignParentRight="true"
      android:layout_alignParentEnd="true" />

   <TextView
      android:layout_width="wrap_content"
      android:layout_height="wrap_content"
      android:text="Tutorialspoint"
      android:id="@+id/textView2"
      android:textColor="#ff3eff0f"
      android:textSize="35dp"
      android:layout_below="@+id/textView"
      android:layout_centerHorizontal="true" />

   <ImageView
      android:layout_width="wrap_content"
      android:layout_height="wrap_content"
      android:id="@+id/imageView"
      android:src="@drawable/logo"
      android:layout_below="@+id/textView2"
      android:layout_alignLeft="@+id/textView2"
      android:layout_alignStart="@+id/textView2"
      android:layout_alignRight="@+id/textView2"
      android:layout_alignEnd="@+id/textView2" />

   <Button
      android:layout_width="wrap_content"
      android:layout_height="wrap_content"
      android:text="Record"
      android:id="@+id/button"
      android:layout_below="@+id/imageView"
      android:layout_alignParentLeft="true"
      android:layout_alignParentStart="true"
      android:layout_marginTop="59dp" />

   <Button
      android:layout_width="wrap_content"
      android:layout_height="wrap_content"
      android:text="Stop"
      android:id="@+id/button2"
      android:layout_alignTop="@+id/button"
      android:layout_centerHorizontal="true" />

   <Button
      android:layout_width="wrap_content"
      android:layout_height="wrap_content"
      android:text="play"
      android:id="@+id/button3"
      android:layout_alignTop="@+id/button2"
      android:layout_alignRight="@+id/textView"
      android:layout_alignEnd="@+id/textView" />

</RelativeLayout>
در اینجا محتوای Strings.xml را مشاهده می کنید.
<resources>
   <string name="app_name">My Application</string>
   <string name="hello_world">Hello world!</string>
   <string name="action_settings">Settings</string>
</resources>
در اینجا محتوای AndroidManifest.xml را مشاهده می کنید.
<?xml version="1.0" encoding="utf-8"?>
<manifest xmlns:android="http://schemas.android.com/apk/res/android"
   package="com.example.audiocapture"
   android:versionCode="1"
   android:versionName="1.0" >

   <uses-permission android:name="android.permission.WRITE_EXTERNAL_STORAGE"/>
   <uses-permission android:name="android.permission.RECORD_AUDIO" />

   <application
      android:allowBackup="true"
      android:icon="@drawable/ic_launcher"
      android:label="@string/app_name"
      android:theme="@style/AppTheme" >

      <activity
         android:name="com.example.audiocapture.MainActivity"
         android:label="@string/app_name" >

         <intent-filter>
            <action android:name="android.intent.action.MAIN" />
            <category android:name="android.intent.category.LAUNCHER" />
         </intent-filter>

      </activity>

   </application>
</manifest>
اجازه دهید برنامه ی AudioCapture شما را اجرا کنیم. فرض می کنیم که دستگاه موبایل خود را به کامپیوتر متصل کرده اید. برای اجرای برنامه از Eclipse یکی از فایل های فعالیت برنامه ی خود را باز کرده و روی آیکن Run از تولبار کلیک کنید.
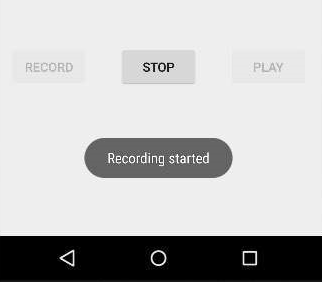
در حال حاضر شما دکمه های stop و play را می بینید که به صورت پیش فرض غیرفعال هستند. فقط کافیست روی دکمه ی start کلیک کنید، که ضبط صدا آغاز می شود و پس از آن صفحه ی زیر را نمایش خواهد داد
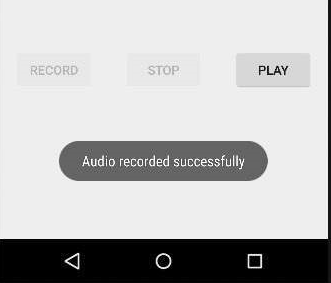
حالا فقط بر روی دکمه ی stop بزنید و صدای ضبط شده را روی حافظه ی خارجی ذخیره خواهد کرد. وقتی که روی دکمه ی stop کلیک کنید صفحه ی زیر نمایش داده خواهد شد
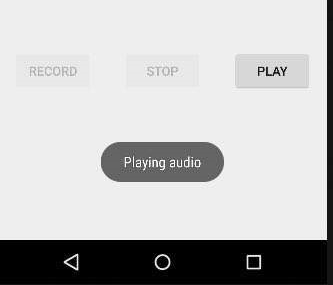
حالا روی دکمه ی play بزنید، که پس از آن صدای ضبط شده روی دستگاه اجرا می شود و در هنگام اجرا پیغام زیر نمایش داده خواهد شد.
- نوشته شده توسط سعید نوشادی
- بازدید: 5158