آموزش تماس تلفنی در اندروید
اندروید یک برنامه ی داخلی را برای برقراری تماس ارائه می دهد، در برخی از مواقع نیاز داریم تا یک تماس تلفنی از طریق برنامه خودمان برقرار کنیم.این کار می تواند به آسانی و با استفاده از یک اینتنت مجازی و با اقدامات مناسب صورت گیرد.همچنین می توانیم از کلاس های PhoneStateListener و TelephonyManager استفاده کنیم.
این آموزش از برنامه نویسی اندروید تمام مراحل ساده ی ایجاد برنامه ای را ارائه می دهد که می تواند برای برقراری تماس استفاده شود. می توانید از اینتنت اندروید برای ساخت تماس تلفنی و فراخوانی آنها از قابلیت تماس در اندروید استفاده کنید.بخش بعدی قسمتهای مختلف Intent object مورد نیاز ما را برای برقراری یک تماس توضیح می دهد.
Intent Object_ عمل برقراری تماس
از عمل ACTION_CALL برای اجرای عملکرد داخلی برقراری تماس که در دستگاه اندروید وجود دارد، استفاده می کنید. در زیر ترکیب ساده ی ایجاد یک هدف با عمل ACTION_CALL را مشاهده می کنید
Intent phoneIntent =newIntent(Intent.ACTION_CALL);
می توانید از ACTION_DIAL به جای ACTION_CALL استفاده کنید که در این مورد گزینه ی تغییر شماره های کدگذاری شده را قبل از برقراری تماس، به جای تماس مستقیم، دارید.
Object Intent_ نوع داده برای برقراری تماس
برای برقراری تماس با شماره ی داده شده ی 91-000-000-0000، لازم است که tel: را به عنوان URI مشخص کنید که از متد setData() استفاده می کند، مانند زیر
phoneIntent.setData(Uri.parse("tel:91-000-000-0000")); نکته ی جالب این است که برای برقراری تماس لازم نیست هیچ داده ی اضافه و یا نوع داده مشخص کنید.
مثال
مثال زیر به طور عملی به شما نشان می دهد که چگونه با استفاده از Android Intent با شماره ی داده شده تماس برقرار کنید.
برای آزمایش این مثال به یک دستگاه موبایل مجهز شده با آخرین Android OS نیاز خواهید داشت. در غیر این صورت مجبور خواهید بود از شبیه ساز استفاده کنید که ممکن است به درستی کار نکند.
شما از Eclipse IDE برای ایجاد یک برنامه ی اندروید استفاده خواهید کرد و آن را با عنوان PhoneCalls تحت یک پکیج com.PRG.phonecalls نامگذاری می کنید. در هنگام ایجاد این برنامه مطمئن شوید که SDK و Compile With را با آخرین ورژن هدف قرار داده اید تا از سطوح بالاتر API ها استفاده کنید.
فایل src/MainActivity.java را تغییر دهید و کد لازم برای حفظ برقراری تماس را به آن بیفزایید.
فایل لی اوت XML را به res/layout/activity_main.xml تغییر دهید و اگر لازم است مولفه ی GUI به آن اضافه کنید. من در حال افزودن یک دکمه ی ساده برای برقراری تماس با شماره ی 9191-000-000-0000 می باشم.
AndroidManifest.xml را همان طور که در زیر نشان داده شده، تغییر دهید.
برنامه را اجرا کنید تا شبیه ساز اندروید شروع به کار کند و نتیجه ی تغییرات انجام شده در برنامه را بررسی کنید.
در زیر محتوای فعالیت فایل MainActivity.java را مشاهده می کنید.
package com.PRG.PhoneCalls;

import android.app.Activity;
import android.content.Intent;
import android.net.Uri;
import android.support.v7.app.ActionBarActivity;
import android.os.Bundle;
import android.view.Menu;
import android.view.MenuItem;
import android.view.View;
import android.widget.Button;
import android.widget.RadioButton;
import android.widget.RadioGroup;
import android.widget.Toast;

public class MainActivity extends Activity {
   Button b1;

   @Override
   protected void onCreate(Bundle savedInstanceState) {
      super.onCreate(savedInstanceState);
      setContentView(R.layout.activity_main);
      b1=(Button)findViewById(R.id.button);
      call();
   }

   private void call() {
      Intent in=new Intent(Intent.ACTION_CALL,Uri.parse("0000000000"));
      try{
         startActivity(in);
      }

      catch (android.content.ActivityNotFoundException ex){
         Toast.makeText(getApplicationContext(),"yourActivity is not founded",Toast.LENGTH_SHORT).show();
      }
   }

   @Override
   public boolean onCreateOptionsMenu(Menu menu) {
      // Inflate the menu; this adds items to the action bar if it is present.
      getMenuInflater().inflate(R.menu.menu_main, menu);
      return true;
   }

   @Override
   public boolean onOptionsItemSelected(MenuItem item) {
      // Handle action bar item clicks here. The action bar will
      // automatically handle clicks on the Home/Up button, so long
      // as you specify a parent activity in AndroidManifest.xml.

      int id = item.getItemId();

      //noinspection SimplifiableIfStatement
      if (id == R.id.action_settings) {
         return true;
      }
      return super.onOptionsItemSelected(item);
   }
}
در ادامه محتوای فایل res/layout/activity_main.xml را مشاهده می کنید.
<RelativeLayout xmlns:android="http://schemas.android.com/apk/res/android"
   xmlns:tools="http://schemas.android.com/tools"
   android:layout_width="match_parent"
   android:layout_height="match_parent"
   android:paddingLeft="@dimen/activity_horizontal_margin"
   android:paddingRight="@dimen/activity_horizontal_margin"
   android:paddingTop="@dimen/activity_vertical_margin"
   android:paddingBottom="@dimen/activity_vertical_margin"
   tools:context=".MainActivity">

   <TextView
      android:layout_width="wrap_content"
      android:layout_height="wrap_content"
      android:text="Drag and Drop Example"
      android:id="@+id/textView"
      android:layout_alignParentTop="true"
      android:layout_centerHorizontal="true"
      android:textSize="30dp" />

   <TextView
      android:layout_width="wrap_content"
      android:layout_height="wrap_content"
      android:text="Tutorials Point"
      android:id="@+id/textView2"
      android:layout_below="@+id/textView"
      android:layout_centerHorizontal="true"
      android:textSize="30dp"
      android:textColor="#ff14be3c" />

   <ImageView
      android:layout_width="wrap_content"
      android:layout_height="wrap_content"
      android:id="@+id/imageView"
      android:src="@drawable/abc"
      android:layout_marginTop="48dp"
      android:layout_below="@+id/textView2"
      android:layout_centerHorizontal="true" />

   <Button
      android:layout_width="wrap_content"
      android:layout_height="wrap_content"
      android:text="Call"
      android:id="@+id/button"
      android:layout_below="@+id/imageView"
      android:layout_alignRight="@+id/textView2"
      android:layout_alignEnd="@+id/textView2"
      android:layout_marginTop="54dp"
      android:layout_alignLeft="@+id/imageView"
      android:layout_alignStart="@+id/imageView" />

</RelativeLayout>
در زیر محتوای res/values/strings.xml را برای تعریف دو ثابت جدید مشاهده خواهید کرد.
<?xml version="1.0" encoding="utf-8"?>
<resources>
   <string name="app_name">PhoneCalls</string>
   <string name="hello_world">Hello world!</string>
   <string name="action_settings">Settings</string>
</resources>
در زیر محتوای پیش فرض AndroidManifest.xml را مشاهده می کنید.
<?xml version="1.0" encoding="utf-8"?>
<manifest xmlns:android="http://schemas.android.com/apk/res/android"
   package="com.example.saira_000.myapplication"
   android:versionCode="1"
   android:versionName="1.0" >

   <uses-permission android:name="android.permission.CALL_PHONE" />
   <uses-permission android:name="android.permission.READ_PHONE_STATE" />

   <application
      android:allowBackup="true"
      android:icon="@drawable/ic_launcher"
      android:label="@string/app_name"
      android:theme="@style/AppTheme" >

      <activity
         android:name="com.PRG.PhoneCalls"
         android:label="@string/app_name" >

         <intent-filter>
            <action android:name="android.intent.action.MAIN" />
            <category android:name="android.intent.category.LAUNCHER" />
         </intent-filter>

      </activity>

   </application>
</manifest>
اجازه بدهید برنامه ی PhoneCalls شما را اجرا کنیم. فرض می کنیم دستگاه موبایل شما به کامپیوتر متصل شده است. برای اجرای برنامه از Eclipse یکی از فایل های فعالیت برنامه ی خود را باز کرده و روی آیکن Run از تولبار کلیک کنید.
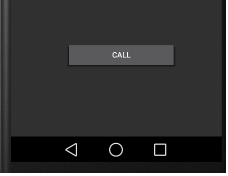
دستگاه موبایل خود را به عنوان یک گزینه انتخاب کنید و سپس آن را چک کنید که صفحه ی زیر را نمایش خواهد داد.

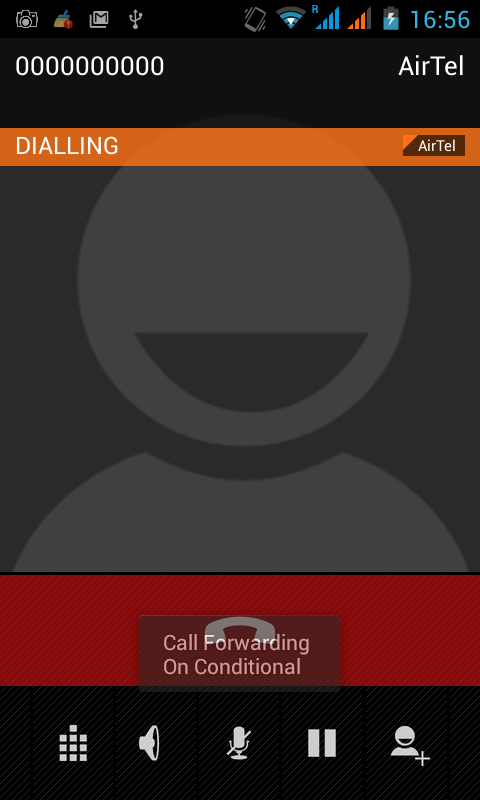
اکنون از دکمه ی Call استفاده کنید تا تماس برقرار کنید، به این شکل که در زیر مشاهده می کنید.


